

No staging environments. No laptop. Just an iPhone, a Mac sitting in the other room, and an AI coding agent running over SSH.
The short version
Mac has Remote Login (built-in SSH server). iPhone connects to it. AI agent runs on the Mac, not on the phone. The phone is just a thin terminal, but with tmux persistence, one-tap project launchers, and background tasks that survive disconnects. You can literally start a multi-minute build, close the app, and check the output later.
If this sounds like a toy, I thought so too. Then I refactored a Next.js app from bed at 2 AM and it actually worked.
Step 1: Turn your Mac into an SSH server
This is the foundation. No third-party server, no cloud VM needed.
On your Mac:
# 1. System Settings > General > Sharing > Remote Login → ON
# 2. Allow only your dev account
# 3. Find your LAN IP
ifconfig | grep "inet " | grep -v 127.0.0.1
# → look for 192.168.x.x or 10.x.x.x, that's your LAN address
On your iPhone:
- Open the app, go to Launch → Add Host
- Tap "Discover Local Devices" (it scans your LAN for SSH hosts)
- Or enter manually: Host
192.168.1.23, Port22, your Mac username, your Mac password - Connect → you now have a real terminal session into your Mac
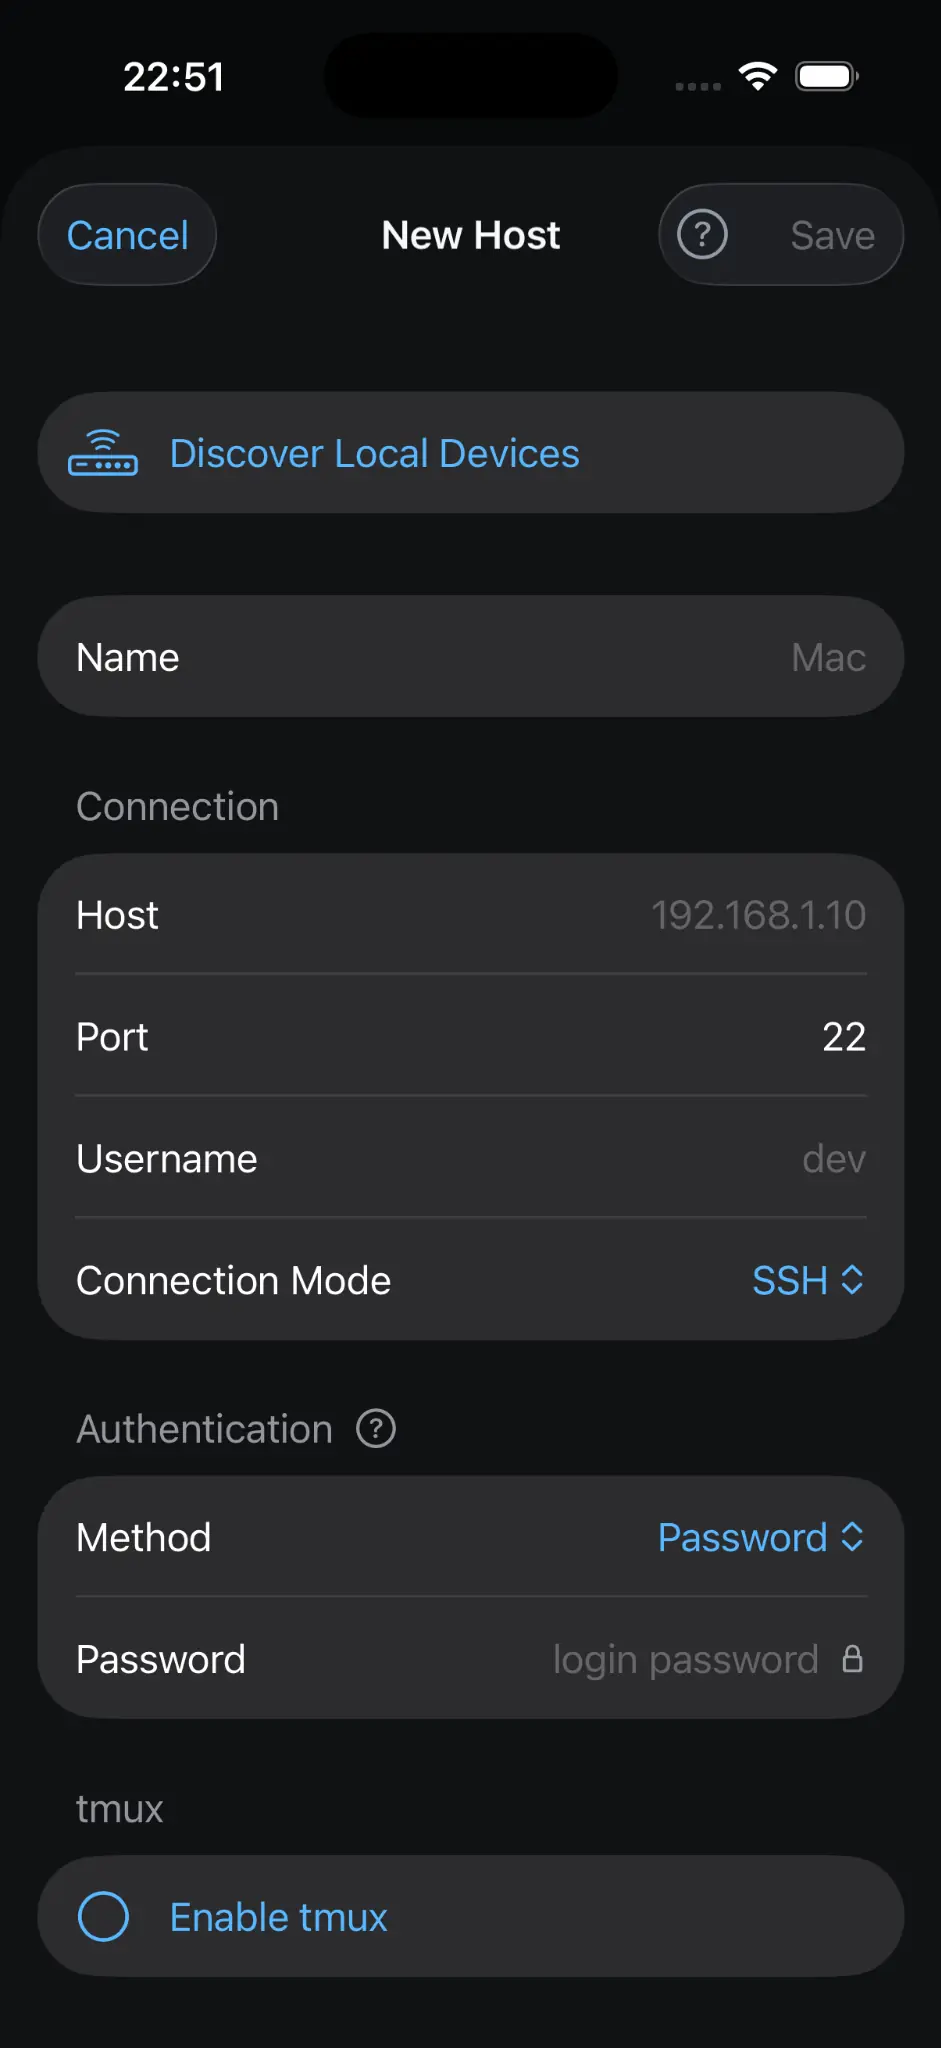
That's it. You're now SSH'd into your Mac from your phone. Navigate to a project, fire up nvim, run git status — it all works. Latency on LAN is around 2–5 ms.
Step 2: Add Tailscale so it works from anywhere
LAN is great for the couch, but useless when you're on cellular or at a coffee shop. Tailscale puts your phone and Mac on the same virtual network without exposing SSH to the public internet.
# On Mac
brew install tailscale
tailscale up

# On iPhone: install Tailscale from App Store, sign in to same account
Now your Mac has a 100.x.y.z Tailscale IP. Use that as the Host instead of the LAN IP. Same Port 22, same credentials. Works from cellular, office Wi-Fi, other countries — wherever.
Don't use Tailscale SSH. Use Tailscale for the network layer, and keep macOS Remote Login as the SSH server with your normal credentials. Much simpler, fewer moving parts.
Other options if you prefer: ngrok TCP tunnel for temporary access, or direct port forwarding if you have a public IP. But Tailscale is the zero-config sweet spot for most people.
Step 3: The workflow that makes mobile coding actually usable
Raw SSH from a phone is painful. Typing long commands, remembering project paths, losing sessions when you switch apps — it adds up. Here's what makes it fast:
Projects + Actions = one-tap launch
Define your project once (working directory, default host). Then create Actions — saved commands with a run mode.
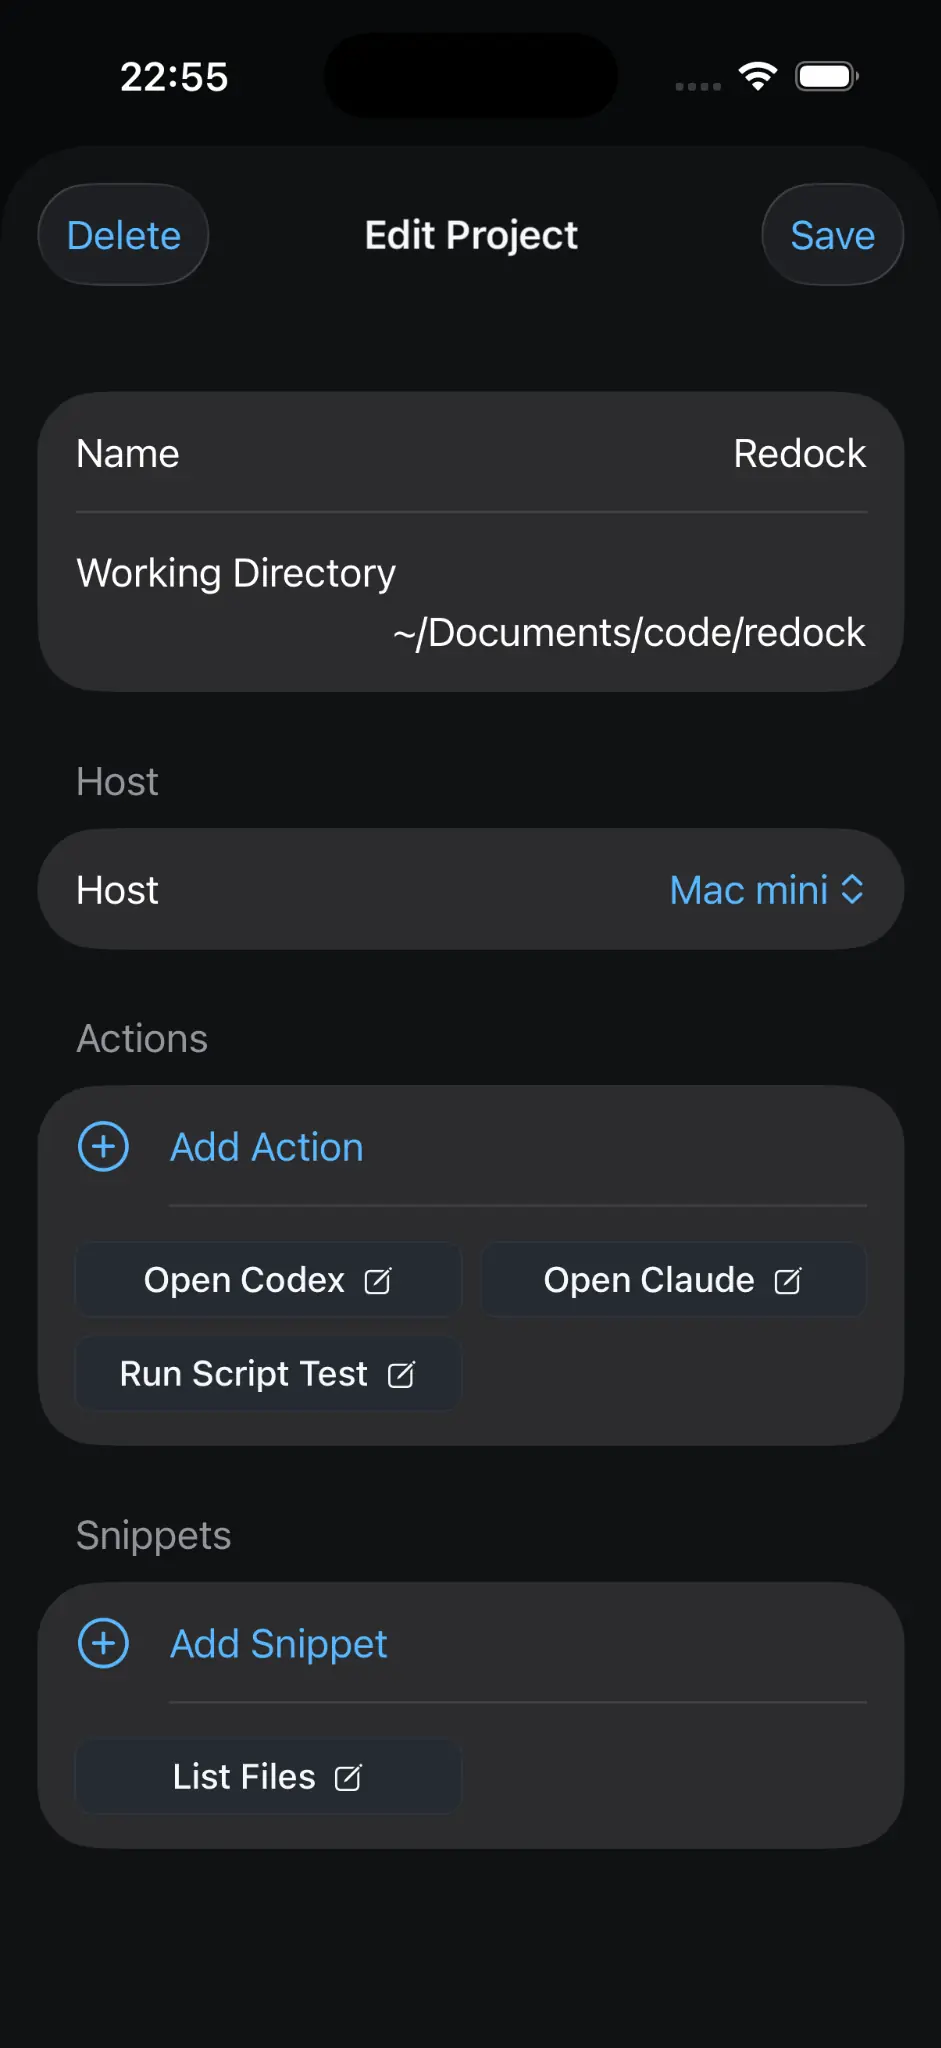
Three run modes matter:
- Terminal Interactive: opens a live terminal session. Use this for AI agents (Claude Code, Codex, OpenCode), REPLs, or anything you need to talk to.
- Quick Task: runs a command over SSH, captures the output, saves it as a Run record. Perfect for
git status,npm test, health checks. - Background Long Task: starts the command inside remote tmux, keeps running after you close the app. For builds, long tests, batch jobs.
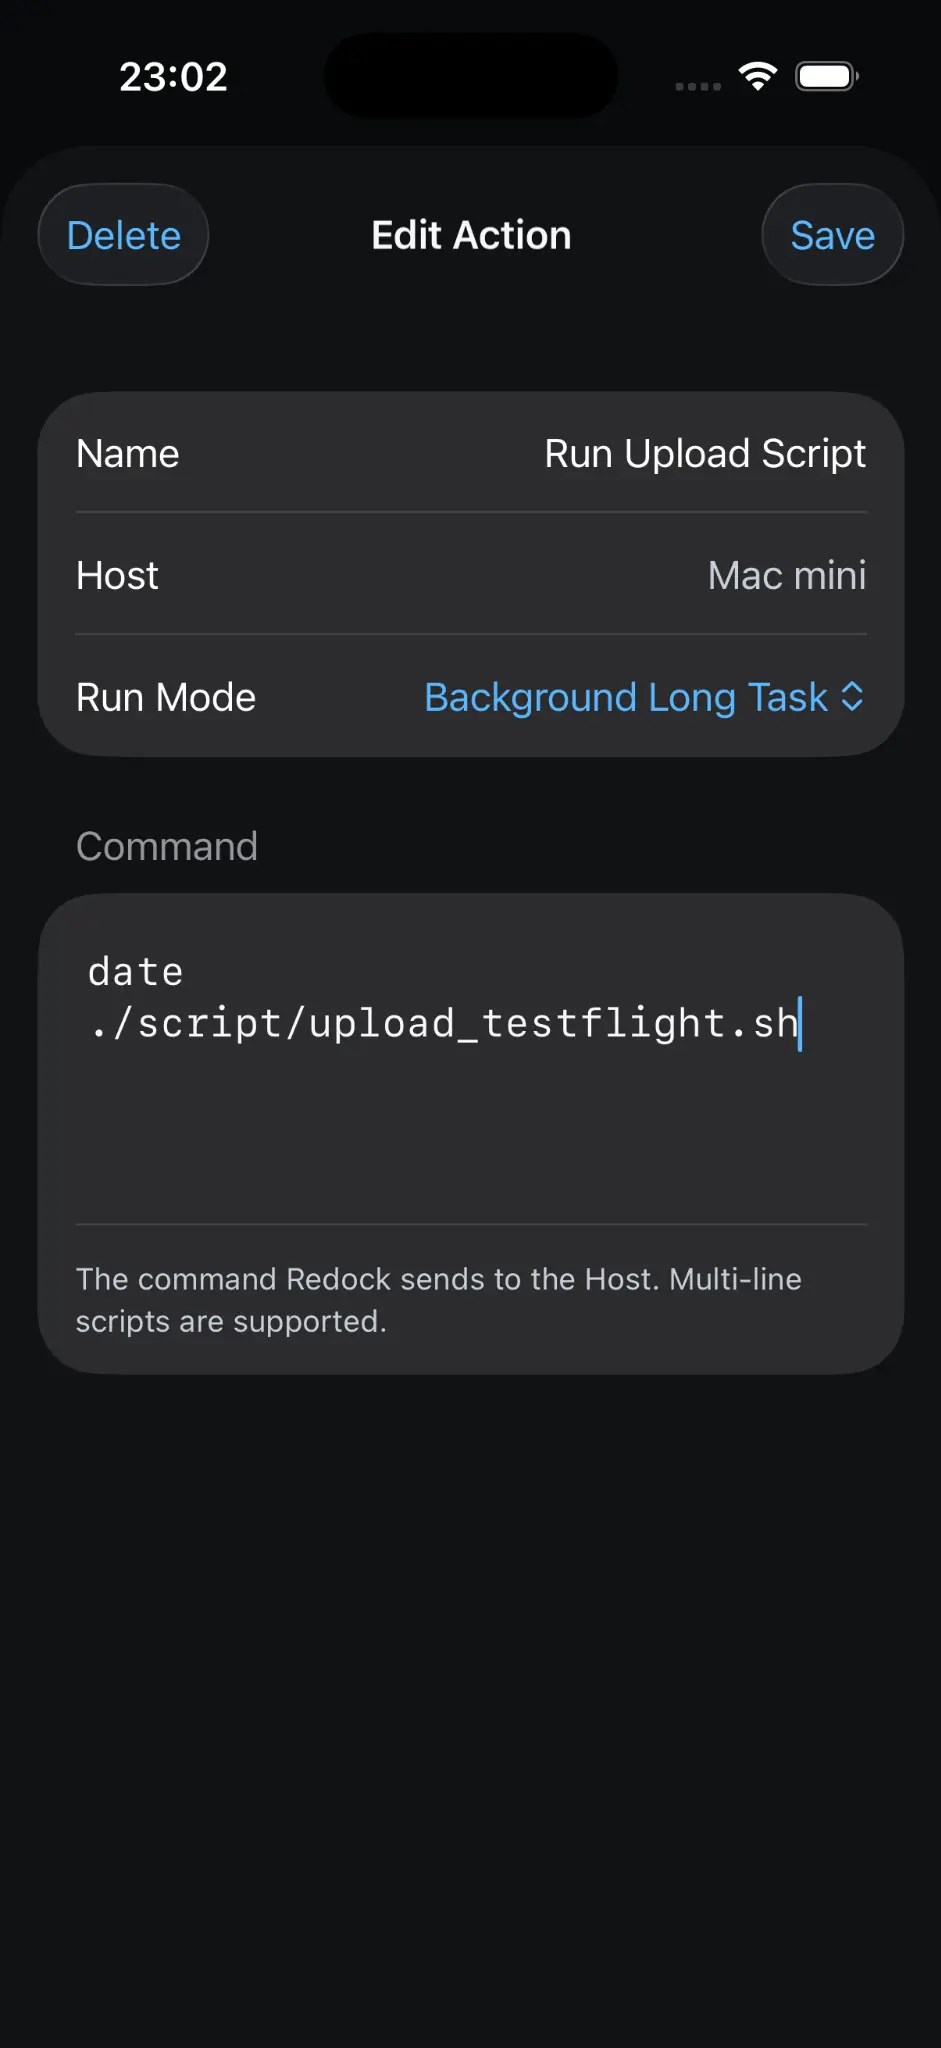
tmux persistence (built-in, not manual)
Install tmux on the Mac:
brew install tmux
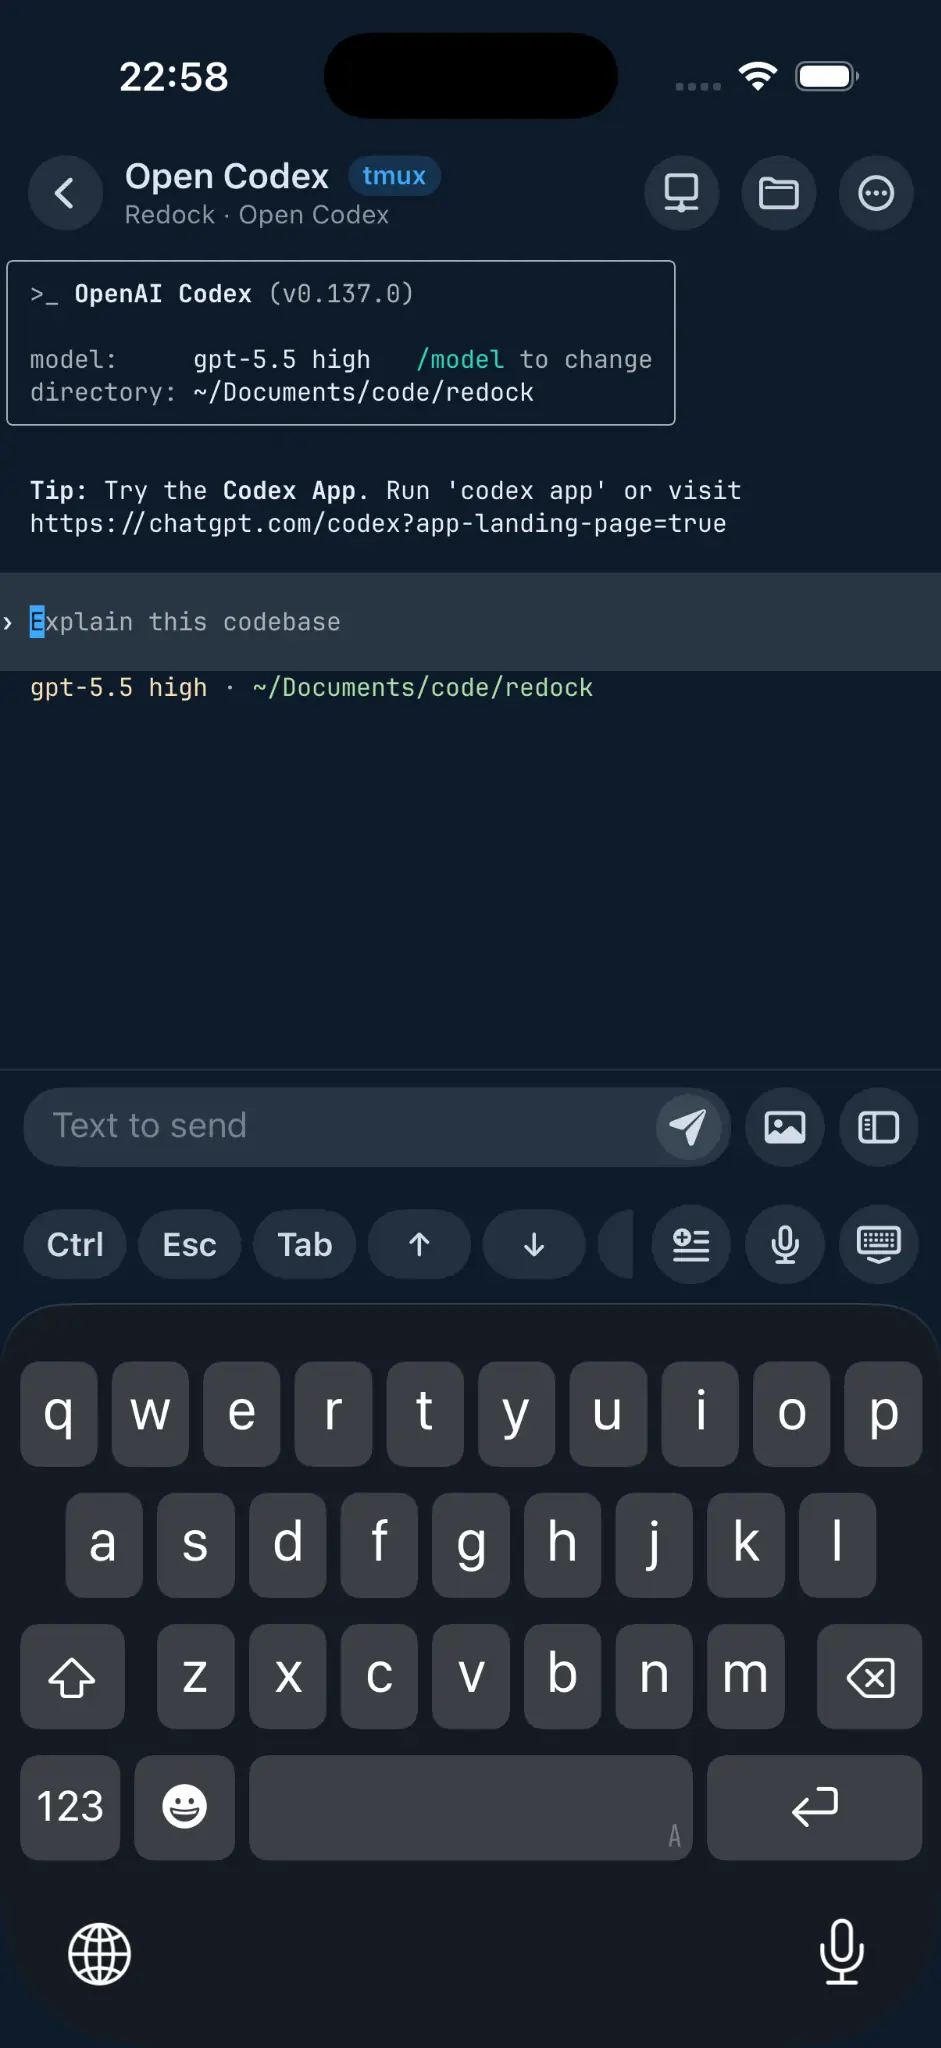
Then enable tmux in the host settings. The app handles session create, attach, and restore automatically. You don't type tmux new or tmux attach — when you reconnect, it shows existing sessions and lets you pick one.
One pane for the AI agent, another pane for watching logs or running tests. If your phone disconnects mid-session, the work is still running on the Mac.
The realistic daily loop
Here's what a typical evening looks like:
- Open phone, tap "My Project" from Launch
- Tap the "Claude Code" action → terminal opens, agent is already in the project directory
- Describe a change, agent starts working
- Switch to terminal connection 2, run
git diffto review - Agent finishes,
git add . && git commit -m "..."from the snippet bar git push
Total taps: maybe 6. Total time on the keyboard: mainly the prompt and the commit message. Everything else is one-tap or snippet driven.
The trick isn't the terminal—dozens of iOS SSH clients exist. The trick is that the project, action, and tmux layer eliminates all the friction around the terminal: remembering paths, retyping setup commands, losing sessions, and digging through history to find old task output.
Q&A
Q: Is this a gimmick or do you actually ship this way?
I use it for real work: quick fixes, PR reviews, starting long builds before bed, and checking CI failures from brunch. It won't replace my desk setup for deep flow-state work, but it covers the other 60% of development moments when I'm not at my desk.
Q: What AI agents work?
Anything that runs in a terminal: Claude Code, Codex, OpenCode, aider, cursor-agent. The agent runs on your Mac; the phone is just the display and keyboard. No mobile app SDK integration needed.
Q: What about latency?
On LAN: 2–5 ms, literally instant. On Tailscale over cellular: 30–80 ms, perfectly fine for terminal interaction. Mosh is also supported if your network is truly terrible.
Q: Security?
Your SSH credentials never leave your phone (stored in Apple Keychain). For Tailscale, the connection stays inside the tailnet. For public access, use SSH keys; the app supports key generation and importing existing keys. Never expose password-auth SSH to the public internet.
Q: Does it work on iPad?
Yes. Same app, bigger screen. Even better for split-pane tmux layouts.
Q: Can I use it with a VPS instead of a Mac?
Yes. Linux VPS works the same way. SSH in, enable tmux, set up projects. If it has a public IP, skip Tailscale entirely and connect directly.
Q: What's the difference between Quick Task and Background Long Task?
Quick Task waits for completion and shows you the output immediately. Good for commands that finish in seconds. Background Long Task fires off in remote tmux and keeps going after you close the app. Check the Run log later. Good for npm run build or test suites that take minutes.
Further reading
- Redock Setup Guide — full walkthrough with troubleshooting
- Tailscale Quickstart
- ngrok SSH Tunnel
- Apple Remote Login